

Move your photos from Google Photos to Synology without losing your mind
This guide is for you if:
- you care about the privacy of your photos
- you don't want to pay Google
- you own a Synology NAS.
Synology offers an alternative called Synology Photos that works "well". To be precise, on Synology DSM (the operating system) 6._ the photos app was called Synology Moments, while on version 7._ it's called Synology Photos. My article will try to cover both, but since I migrated to version 7, this is the primary target of my guide.
Here's a rough guide on the process.
- Go on Google Takeout - the unified service to download all your data from google servers - and select only the photo albums you want to download.
- Take the download link and download it on your NAS. You'll need a browser extension for this. I use cliget for Firefox.
- SSH to your nas and extract the archives.
- Rsync photos in the right folder.
Scary, of all those steps? It took me months to perfect this procedure, but now I am quite happy with it and I have almost completed the migration. In the end, it's not that difficult but it will require time. Be prepared.
Download backup from Google Takeout
This step is mostly point-n-click.
- Go on takeout.google.com and log in
- select only google photos.
- Then, wait a lot (20-30 seconds?) until the button All photo albums appears.
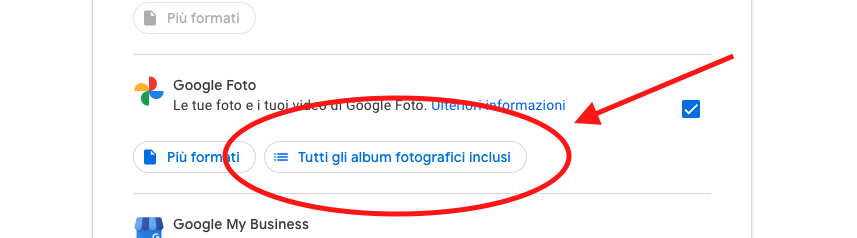
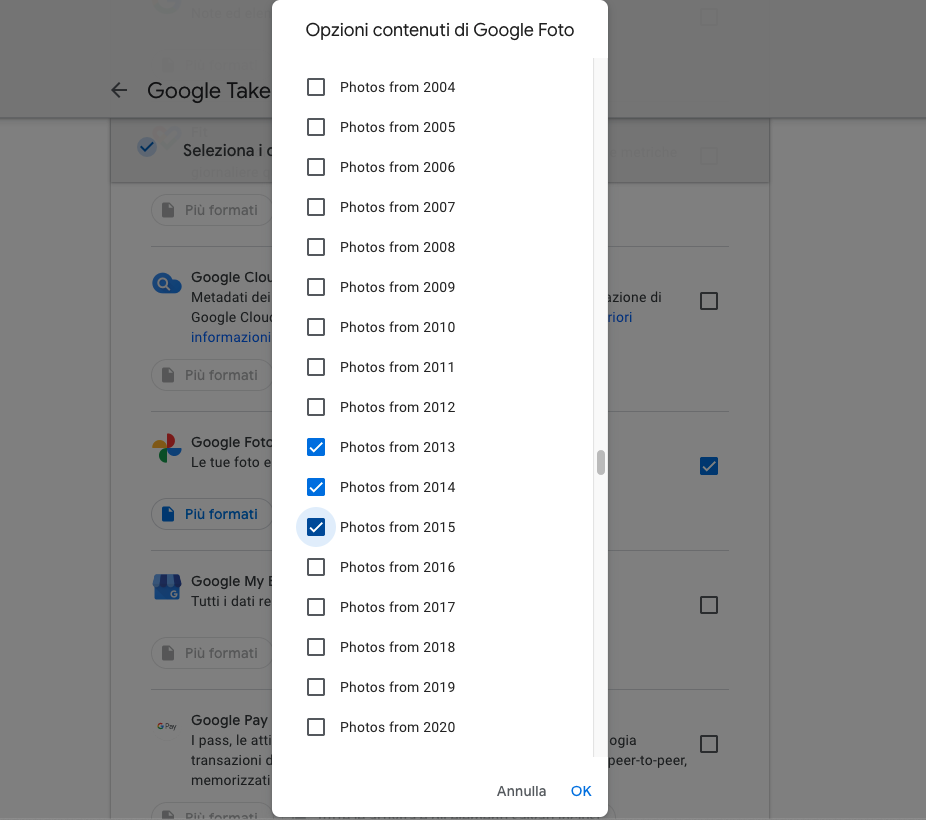
- Click on deselect all again and select only albums Photos from XXXX that you are interested to. These are albums that will contain all photos for every year; I assume other albums contain duplicates of these photos, that's why I deselected all the others.
tip: you can select only one year to do a test before selecting all years.
- Go to step two. Select Email me a link to downlad and select 50 GB archive size. We will download the archive on the NAS directly, without passing from our local pc.
- Click on create export and wait a couple of hours. You'll receive an email from Google when this is done.
Download the files directly on the NAS
For this, you'll require:
- ssh access on the NAS
- a browser extension that allows cookies in download link. I use cliget for Firefox. Basically, this extension will translate the download link to a
curlstring.curlis a command that allows to make http requests with a lot of options; in our case, it will attach google cookies so Google will believe that we are logged users that are doing the download. I don't use Chrome so I hope somebody will suggest a similar extension for Chrome in the comments.
So, back to the procedure.
Google will send you a link to download your files. Once you click on "download", Google will ask you to log in again and then the browser will prompt to select a location where to download the file. Click cancel here. As i said, we're not going to download the files on the pc, but rather we're going to get the curl string to download the file on the NAS.
So, once you've clicked "cancel", click on cliget extension:
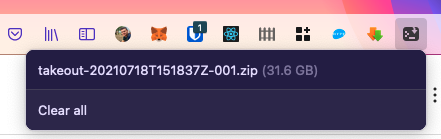
And now, click on the export file, you'll get a curl executable string:
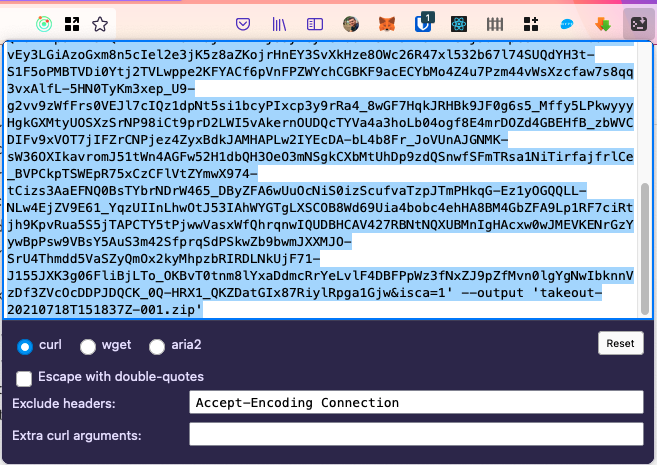
Copy this very long, preselected string and open an ssh connection to your Nas:
$ ssh <nas-address>
  # from now on, if connection succeded, we are operating on the NAS
$ mkdir google-takeout
$ cd google-takeout
  # paste the very long curl string here followed by `&`
$ curl ......... --output 'takeout-20210718T158137Z-001.zip' &
Note the & at the end. If you're not familiar with unix, this means "start this process in the background". At this point you'll see that the terminal will start to become a little bit messy, with curl output breaking text. However, type exit and hit Enter. You'll exit the ssh connection while the curl operation will still be in place.
Depending on how big are your archives, this can take a lot of time. Do this for every file google has created.
You can re-enter ssh and check if the file is still downloading by doing a couple of ls -al and check the files size, if its getting bigger and bigger, this means that the download is in progress.
Extract archives
I am honest with you, I do this step with UI, but since we are on a terminal you could also ssh on to the nas and launch
$ 7z x takeout....zipand wait. This will take some time...
The archive contains photos and json files that contain some extra properties on those photos. So, for example you may find file IMG00132.jpg and file IMG00132.jpg.json.
In .jpg files you'll find all the original metadata, like GPS coordinates, dates, etc. This is true for all photos, except those created by Google Photos like GIFs, videos, and collages.
So what's in json files? There are some more metadata that is inferred by google photos, here's an example:
{
  "title": "IMG_0349.JPG",
  "description": "",
  "imageViews": "20",
  "creationTime": {
    "timestamp": "1464882293",
    "formatted": "2 giu 2016, 15:44:53 UTC"
  },
  "photoTakenTime": {
    "timestamp": "1464873329",
    "formatted": "2 giu 2016, 13:15:29 UTC"
  },
  "geoData": {
    "latitude": 46.62...,
    "longitude": 8.58...,
    "altitude": 1445.117...,
    "latitudeSpan": 0.0,
    "longitudeSpan": 0.0
  },
  "geoDataExif": {
    "latitude": 46.62...,
    "longitude": 8.58...,
    "altitude": 1445.1176...,
    "latitudeSpan": 0.0,
    "longitudeSpan": 0.0
  },
  "url": "https://lh3.googleusercontent.com/vwjRf...",
  "googlePhotosOrigin": {
    "fromSharedAlbum": {
    }
  }
}
If you read online, for example in the documentation of projects like this, you may think that photoTakenTime is not preserved. Indeed, I did a few checks and for all original photos it is preserved. Only the created photos (gifs, videos, collages) will not have the right exif attributes and those will show up with today's date. So, you may want to use the linked tool to sanitize EXIF data on your photos. I didn't.
Copy files to Synology Photos dir
And now the last part of this tutorial.
Once you have extracted the archive this is the folder structure:
google-takeout | |-- Takeout | |-- Google Photos | |-- Photos from 2015 |-- Photos from 2016 |-- ...
google-takeoutis the folder I suggested to create, where we're going to operate.Google Photosmay be actually translated by Google. In my case (italian), it'sGoogle Foto.
Now, we need to understand where we want to put these photos. As I said, I was coming from DSM 6._ and later I moved to DSM 7._.
- For DSM 6.*, Synology Moments used to store photos in
~/Drive/Moments/ - DSM 7.* Synology Photos is storing
~/Photos/. Also, if you did the migration, your Moments photos are in~/Photos/Moments.
I think we are ready for the copy. To do that I prefer to use rsync for its simplicity. Here's the command I use. Launch it from ~:
$ rsync \
-avr \
--ignore-existing \
--dry-run \
--exclude '*.json' \
--stats \
--progress \
./google-takeout/Takeout/Google\ Foto/Photos\ from\ 2016/ \
Photos/Moments/2016/-avrmeans "preserve all unix attributes, verbose, recursive"--ignore-existingis to avoid to overwrite files that are already there. This way you can also relaunch the process multiple times if anything goes wrong.--dry-runis only used for testing. Basically, it executes the rsync command but will not write to disk, so it's good to see what will happen when the command is launched for real.--exclude '*.json'to avoid copying json files.--statsto see nice stats at the end.--progressto get a nice progress status- The last two lines are the source folder and the destination folder. Note: the Google Foto folder can have a different name if you are using Google in another language!!!
You may prefer the command on one line:
$ rsync -avr --ignore-existing --dry-run --exclude '*.json' --stats --progress ./google-takeout/Takeout/Google\ Foto/Photos\ from\ 2016/ Photos/Moments/2016/Again, remember to remove option --dry-run to actually copy files otherwise the command will have no effect.
As you can see I prefer to organize folders based on years. You are not forced to do so.
You'll have to launch this command for every Google Photo album that you have.
Conclusion
This was a huge jurney. It took me some months to figure out, some days to actually find the will to do it, and a couple of hours per every year that I transferred. I hope this article will help someone because all the info I found on the web were very sparse and this is probably the first article that contains all the journey from start to end.
Enjoy your photos!